
How to Build a Raised Garden Bed
Starting a garden can be intimidating, but building a raised garden bed makes it a breeze. It's maybe one of the simplest ways to grow homegrown vegetables, herbs, or flowers in your own backyard. You don't need a lot of space, expensive machinery, or professional knowledge — only a little planning and a weekend of light work.
Raised beds are a favorite among both new and experienced gardeners since they make it easier to plant, clean, and organize. You can tailor them to your yard, choose the perfect soil mixture, and even design them as beautiful focal points within your landscape.
Whether you're gardening on arid Utah soil, rocky terrain, or a small patio, this step-by-step guide takes you through every aspect of building a raised garden bed that's practical, affordable, and fun.
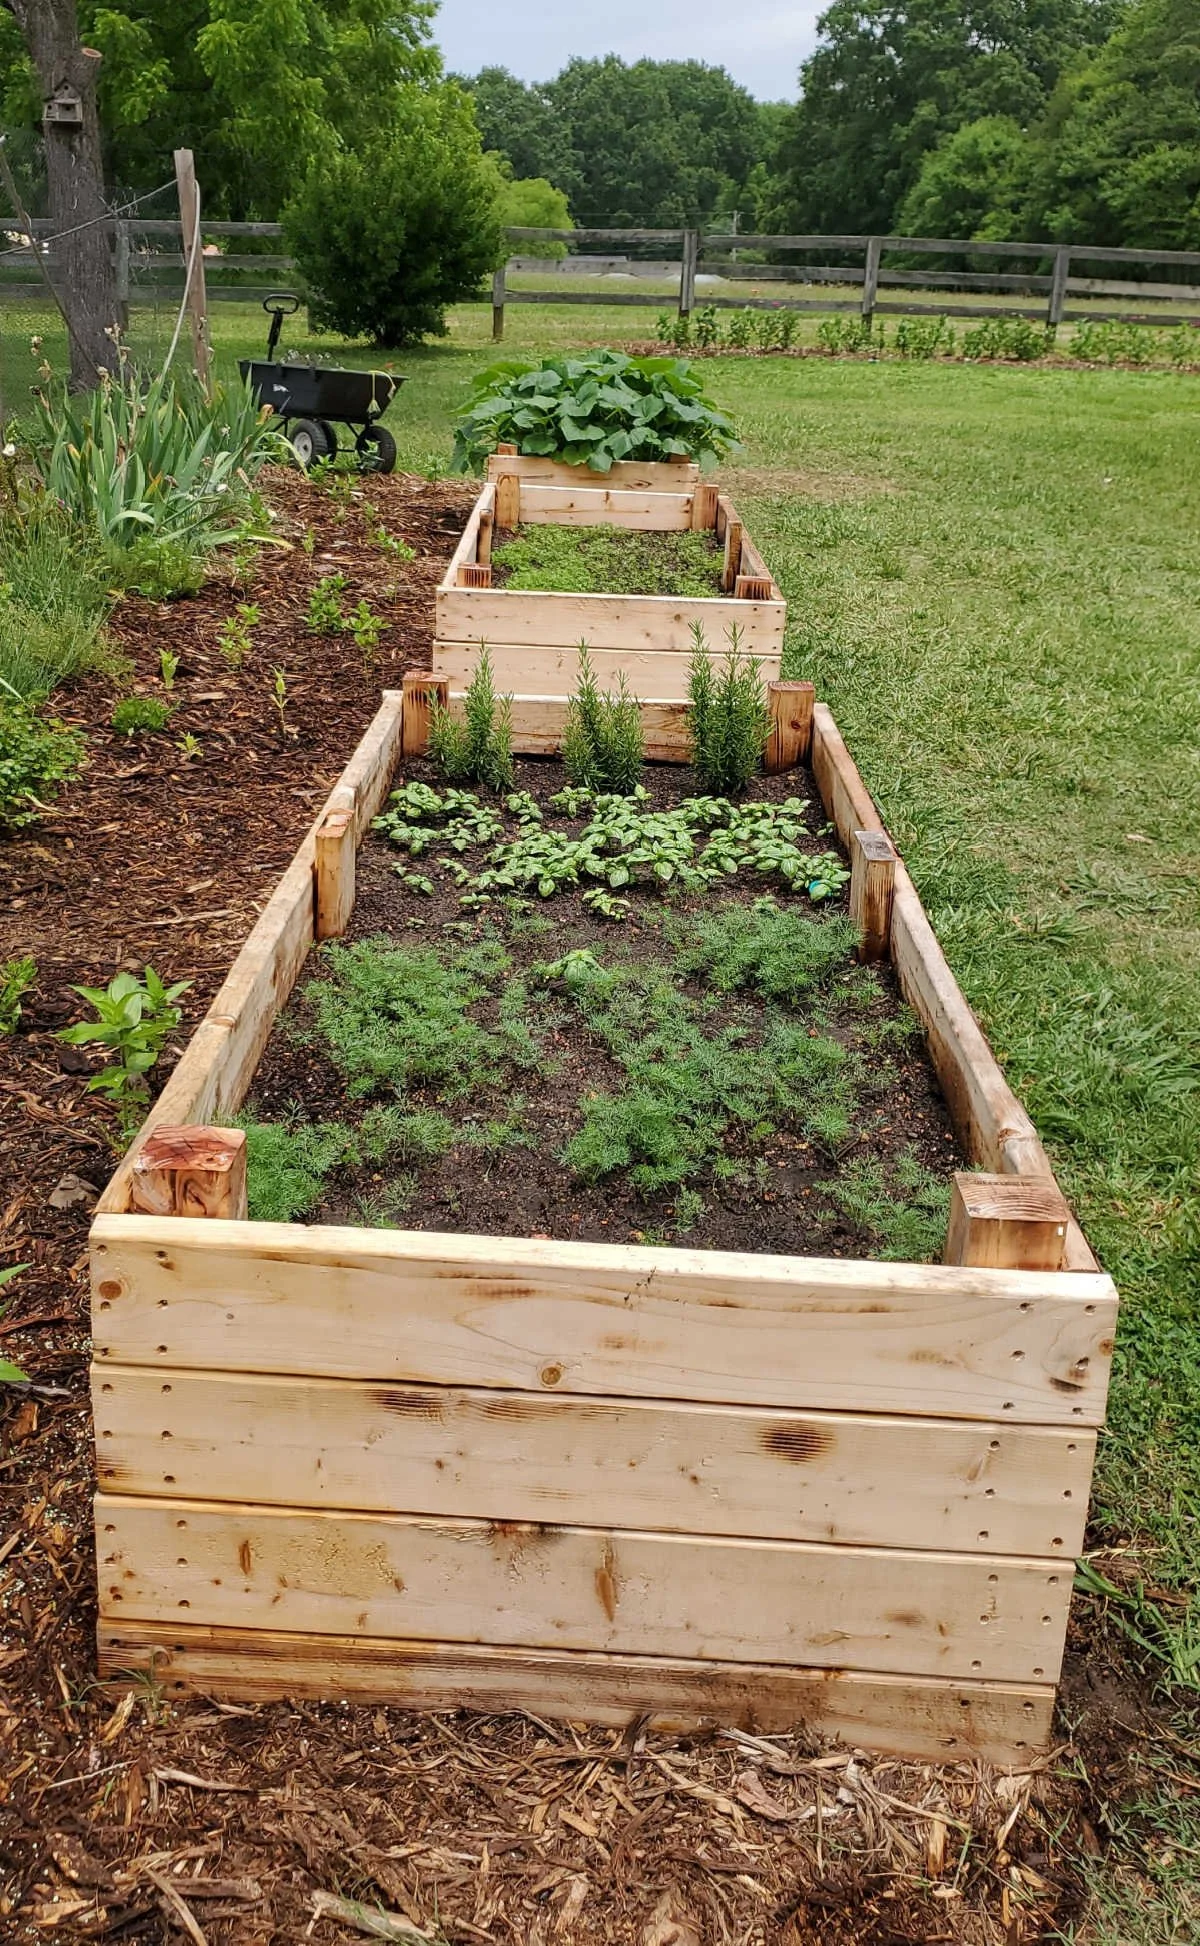
Picture Credit: https://afarmgirlskitchen.com/raised-garden-bed/
Why Raised Beds Are Worth It
A raised garden bed is more than just a pretty box full of dirt — it’s a smarter way to garden. Because the soil is elevated, it warms up faster in the spring, drains more efficiently after rain, and gives roots more oxygen. You’ll spend less time fighting weeds and more time enjoying your plants.
Another major benefit is control. You get to decide on exactly what you put into your ground, so you're able to create the ideal conditions for whatever you're planting. Even if your original soil ground is full of clay or sand, a raised bed lets you start from scratch.
And let's face it — raised beds are just aesthetically pleasing. They present tidy rows, clear boundaries, and have a sense of purpose in your garden design. You can build one to suit your yard's style, be it rustic wood, sleek metal, or sleek stone.
Top Benefits of Raised Beds:
Healthier soil with better drainage and structure
Easier access for planting and harvesting
Less bending and kneeling to perform garden tasks
Less weed growth and fewer pests
Extended growing season with warmer soil
A neat, clean look for your lawn
Step 1: Locate the Perfect Place
How well your garden does depends largely on where you locate it. Choose a site that gets at least six to eight hours of direct sunlight a day, since most vegetables and herbs thrive in full sun. Avoid shady areas or areas under large trees that will block out your garden and sap away nutrients.
Whenever possible, choose a level area to make construction and water delivery easier. Steer clear of locations where rainwater collects or where the soil is still damp following rain showers. Also, it makes sense to locate your garden bed snear a water source so you can easily connect a hose or drip irrigation system.
If you have a small yard, you can even install raised beds on a fence line or patio. Just make sure the bottom does have drainage so roots do not rot from being in water.
Step 2: Gather Materials and Tools

Picture Credit: https://afarmgirlskitchen.com/raised-garden-bed/
You don’t need much to get started — a few sturdy boards, screws, and soil will do the job. Most people use untreated wood like cedar or redwood because it’s naturally rot-resistant and safe for growing food.
What You’ll Need:
Four boards (2x10 or 2x12 lumber works well)
Galvanized screws or corner brackets
Power drill or screwdriver
Measuring tape and hand saw
Level and shovel
Landscape fabric or cardboard (for weed control)
Topsoil and compost mix
Optional Add-Ons:
Gravel for extra drainage
Aesthetically pleasing posts or caps for looks
Metal or stone edging for a modern appearance
If you want to make your bed last longer, consider galvanized steel or concrete blocks. These endure years and can add visual contrast to your garden.
Step 3: Measure, Cut, and Build the Frame
The most common raised bed size is 4 feet wide and 8 feet long with about 12 inches of depth. Its width allows you to reach to the middle from both sides without going inside and filling the soil.
Once you’ve measured your boards, cut them to size and assemble them in a rectangle. Use screws or metal brackets to secure the corners tightly. Check your frame with a level to ensure it’s even — a tilted bed can lead to uneven watering and soil erosion over time.
If you're going to build more than one bed, leave space between them for paths or for wheelbarrow travel. Two feet of distance between each bed will make future maintenance easier.
Step 4: Prepare the Ground
Before filling the bed, take a few minutes to prepare the ground below. Remove any grass, rocks, and debris first. Next, place a layer of cardboard or landscape fabric to suppress weeds but not prevent water from passing through.
If you’re building directly on top of hard soil, loosen it with a shovel or garden fork to improve drainage. For beds on patios or gravel, add a thin layer of gravel or small stones at the bottom. This helps prevent standing water and protects roots from rot.
Taking the time to prepare the ground properly can make a huge difference in how healthy your plants grow later on.
Step 5: Soil and Compost Filling
Now it's time to get the garden growing. The soil you use is the most important aspect of a raised bed, as it's where all the support and nutrition your plants will need comes from.
The best mix is light, rich, and drainy. The simplest recipe is as follows:
Ideal Mix:
60% topsoil
30% compost
10% perlite or coarse sand
Mix these together before adding them to the bed so they are evenly spread. Water lightly into soil when filling to settle. Shorten by an inch from the top of the rim so overwatering when you water in the future won't spill over.
If vegetables, add organic fertilizers like bone meal, worm casting, or composted manure to give your plants an extra dose of nutrients.
Step 6: Plant Your Garden
This is where things become interesting. Having filled your bed, you can now start planting. One of the best things about raised beds is that you can grow virtually anything — herbs, greens, flowers, even fruiting vegetables like tomatoes and peppers.
If you are gardening in Utah or some other dry region, select plants that thrive in heat and low humidity, such as:
Tomatoes and peppers
Zucchini and squash
Rosemary, sage, and thyme
Leafy greens in spring and fall
Plant your plants in a manner so that the taller plants don't shade out the smaller ones. Cover the ground with mulch to keep it moist and block weeds from growing. You can even install drip irrigation or even a simple soaker hose to make watering easy.

Step 7: Maintain Your Raised Bed
Once your raised bed is built, care is simple but frequent. Water your plants well two to three times a week, based on the climate. Check the soil frequently — since raised beds drain so fast, it's better to water deeply than frequently.
At the end of each season, add fresh compost to restore nutrients your plants absorbed. You may also need to top your soil annually because it will settle naturally. Inspect the wood frame for looseness, and replace boards as needed to keep everything secure.
Raised beds require minimal weeding to do, but clearing out any that appear early will have your garden looking neat and healthy.
Final Thoughts
Building a raised bed garden is one of the most rewarding weekend activities you can do. It makes you the boss, lets your imagination run wild, and gives you a connection to your food that's impossible with packaged food. And it is beautiful no matter what yard you have and can be designed to fit your environment and style.
With a little effort ahead of time, you'll be enjoying years of low-maintenance gardening, homegrown food, and the satisfaction of harvesting what you've planted. Whether starting small or getting ready for an entire backyard garden, a raised bed is the perfect launching pad for success.