.webp)
Understanding how to read a topographic map is a valuable skill for hikers, campers, hunters, and anyone spending time off the beaten path. These maps help you visualize terrain, plan routes, and stay safe in areas where GPS might fail or signals are weak.
Whether you’re planning a backpacking trip or exploring raw land, here’s how to read a topo map step by step.
What Is a Topographic Map?
A topographic map shows the elevation, shape, and layout of the land using contour lines, symbols, and color. Unlike basic road maps, topographic maps give you a 3D sense of terrain on a 2D surface.
You’ll find:
- Contour lines that show elevation and landforms
- Symbols for natural and manmade features
- Scale and grid for measuring distance and orientation
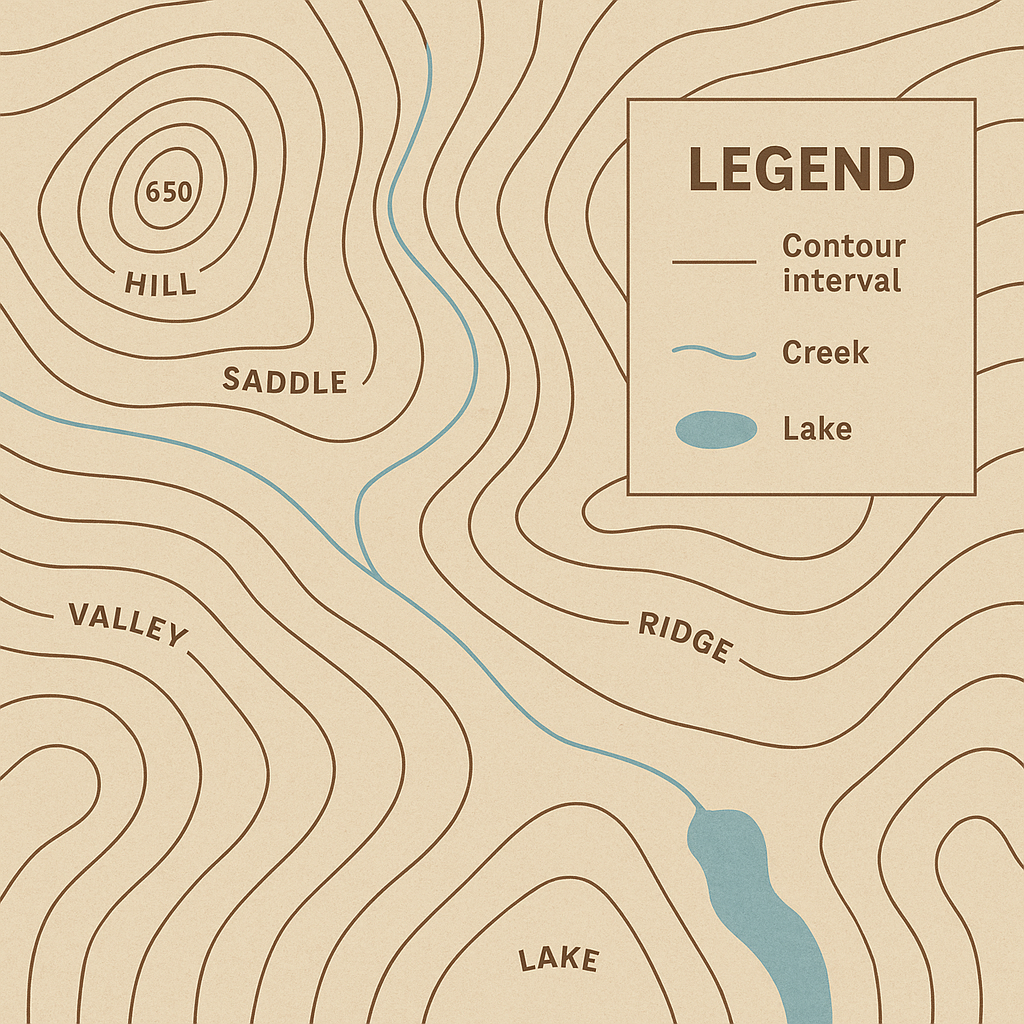
Step 1: Understand Contour Lines
Contour lines are the most important feature of a topo map. Each line connects points of equal elevation.
- Closely spaced lines = steep slope
- Widely spaced lines = gentle slope
- Concentric circles = hills or depressions
- V-shaped lines pointing uphill = valleys
- V-shaped lines pointing downhill = ridges
The elevation change between lines is called the contour interval, usually listed at the bottom of the map.
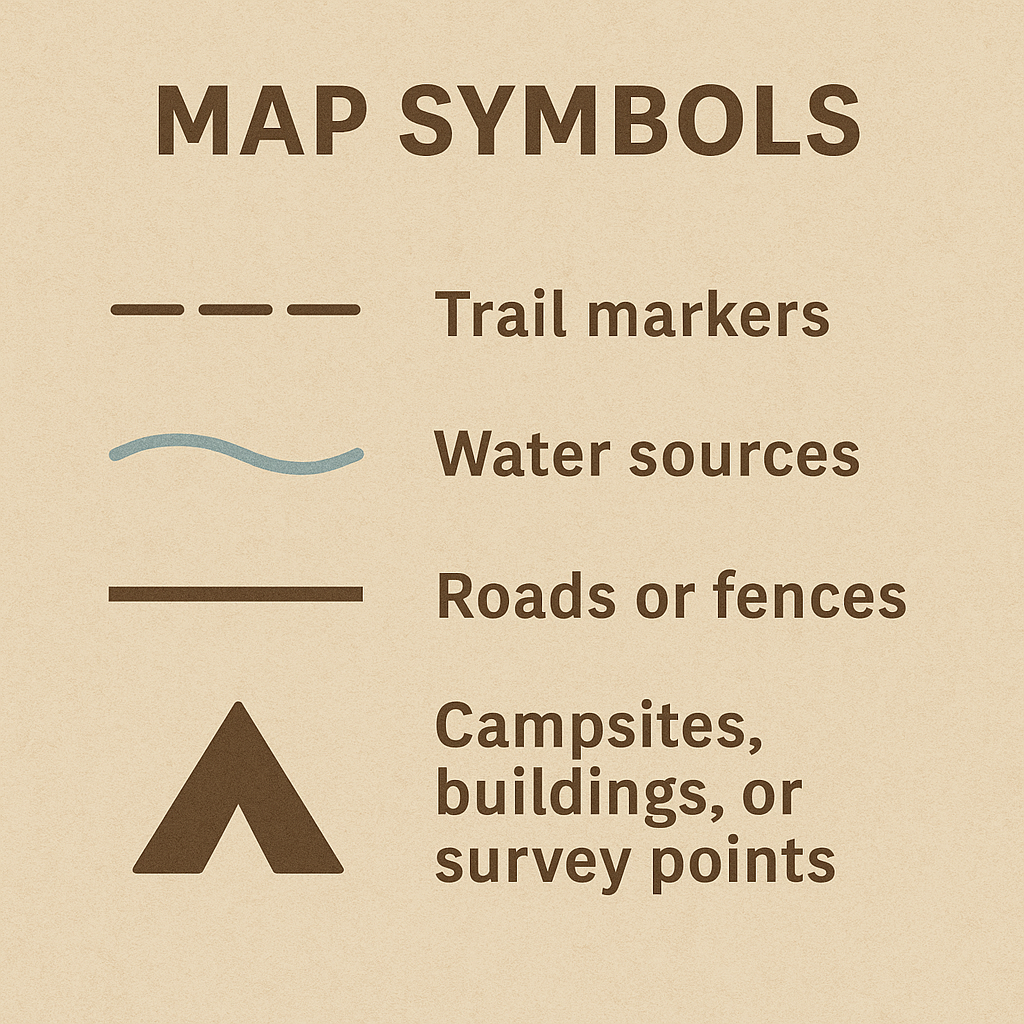
Step 2: Check the Legend and Scale
Every map has a legend (key) that explains what the symbols mean. Look for:
- Trail markers
- Water sources
- Roads or fences
- Campsites, buildings, or survey points
The scale shows how map distances relate to real-world distance, such as 1:24,000 (1 inch = 2,000 feet). Use the scale to plan how far you’ll hike or travel.
Step 3: Use the Grid System
Topographic maps usually include a latitude/longitude grid or UTM coordinates, which help with precise navigation. You can use these with a GPS device or compass to triangulate your location.
If using UTM:
- Vertical lines = eastings
- Horizontal lines = northings
- Combine both for a coordinate (e.g., 12T 0456789 / 4512345)
Step 4: Recognize Terrain Features
Practice identifying these common terrain features:
- Ridge: Contour lines form a long, narrow high point
- Valley: Lines dip into a V shape, often with a water feature
- Saddle: A low point between two peaks
- Cliff: Lines very close together or touching
- Summit: Closed circles with highest elevation in center
Knowing these shapes helps you plan safe routes and avoid hazards.

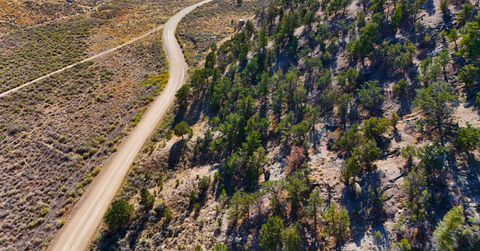
Step 5: Apply It in the Field
Take your topo map with a compass or GPS, and cross-reference often:
- Use contour lines to anticipate elevation gain or loss
- Look for landmarks like creeks, ridges, or roads
- Plan backup routes if trails are unclear or impassable
Practice in familiar areas first before relying solely on a topo map in the backcountry.
Final Tips
- Waterproof your map or use a clear map case
- Mark your route in pencil to make adjustments as needed
- Combine paper maps with digital tools like Gaia GPS, AllTrails, or onX if signal allows
Conclusion
Reading a topographic map may feel intimidating at first, but with a little practice, it becomes second nature. Whether you’re hiking new trails, hunting public land, or exploring remote properties, this skill keeps you prepared and confident outdoors.
.png)
.png)
%20(446%20x%20128%20px)%20(306%20x%20105%20px)%20(2)%20(1).webp)


